|
Basic Photographic Lighting Techniques |
|||
| Written By Cameraman Jim: http://www.sigma-2.com/camerajim/index.htm | |||
|
The Importance of Good Photographic Lighting |
|||
| Light is nearly as important a tool as your camera. |
Learn how these terms
effect product photography... photographic: diffuser, direction, fill, flat, highlight, key, main, reflector, softbox, light stand, light tent, shadows, tripod, umbrella, bright window |
||
|
It may be strange to think of light as a tool because it
always seems to be there. After all, you can take a snapshot
almost anywhere with either available light or the illumination
from a built-in flash which turns on automatically. In fact, you
are always choosing your lighting (even if only by default), and
it is shaping how your subject appears.
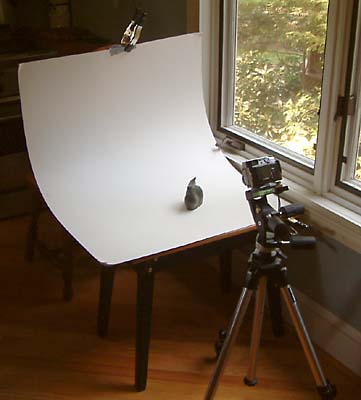
The key to effective product photography is lighting, and the key to effective lighting is control. Once you understand how, you can control the strength, size, position, color and number of lights you use. And each of these controls changes how the subject looks. However, let's take it one light at a time... An Easy and Simple Window Lighting Photo SetupIf I had to choose just one light to use for product photography, it would be the illumination coming from a bright, non-sunny window. That's because this light is both large (which is what makes it diffuse and soft), and it is directional which can help show off the shape and texture of my subject. Here is probably one of the most basic eBay photo setups, right next to a bright window. In this setup, a sheet of white poster board is clamped to a small table, curved up and clamped again to the back of a chair.
Use a Tripod for Sharp Photos
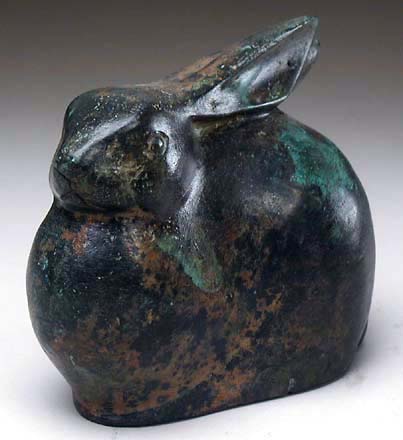
Notice also that while the window throws a nice soft glow on
the little bronze rabbit I'm shooting, the left side of the
rabbit is pretty dark...
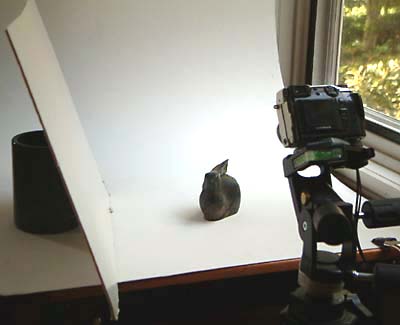
Creating a Second Light with a Photographic ReflectorSo, I'm going to add a second light to lighten or fill the shadows on the other side of the subject. In this case, my fill light is nothing more than a flat piece of poster board, propped up and used as a reflector. For those who like to know the "in" jargon, such a flat reflector is commonly referred to as a "flat."
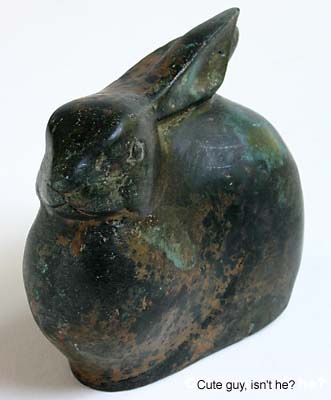
If the main light is too strong in relation to the fill light, the highlights will be washed out and the shadows will be too dark. If the fill light is too strong, you might wipe out the shadows completely and lose the sense of shape they give your subject. One of the advantages of a digital camera is seeing an immediate review of your results on the LCD screen, so you can easily experiment with your fill light until the ratio of highlights and shadows looks right to you. So, here's our little rabbit, shot with the above setup...
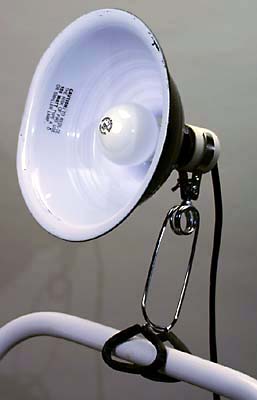
Basic Artificial Light Photographic SetupBut what if you don't have a handy window like that or need to shoot at night? Then, you can use plain old tungsten (incandescent) light. These are just regular household bulbs — the kind you use in your table lamps. A couple of 150 watt bulbs would be enough as long as you remember to use that tripod. You can use these bulbs in either photographic reflectors with light stands (available on eBay or from a camera shop) or just in simple clamp-on reflectors (sold at home centers for $10 or less) such as this one...
Here, thanks again to
shipscript, is a simple indoor two-light setup...
Notice both lights are at about 45-degree angles to the
subject and the fill light is farther back so it won't be as
strong. In general, if the wattage of the two lights is the
same, you want the fill light to be about 50% farther away. Or
you can use a lower wattage bulb in your fill light and position
it at about the same distance as your key light.
Photographic Light Diffusing for Window-Like SoftnessYou can turn those lights into soft, window-like sources by aiming them through translucent white material (a sheet of tracing paper, a piece of white plastic, etc.) or by bouncing them off reflectors. Professional photographers use many tools and techniques to diffuse light. If you don't mind spending a few bucks (or more), here are a couple of the more useful ones.
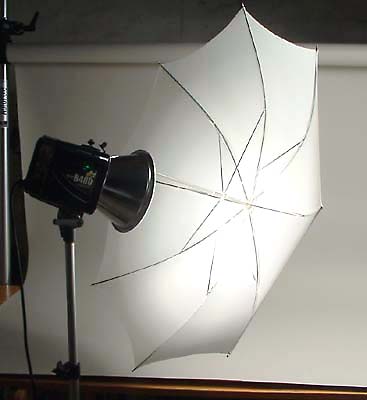
Using a Photographic Umbrella as a DiffuserFirst, below is a white photographic umbrella attached to a studio light. In this case, the light is shining through the umbrella, but the whole thing could also be turned around to use the light bounced off the inside surface of that umbrella...
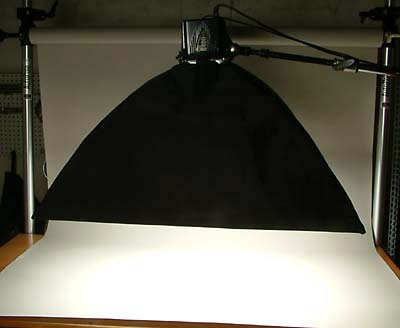
A Softbox Diffuser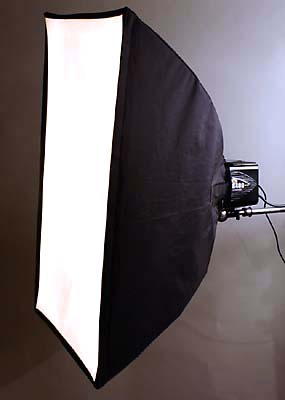
Below is another professional lighting tool, a softbox (not to be confused with a light tent — more about that later). A softbox is a large cloth reflector. The light is placed at
the rear of this reflector and shines through a large
translucent front panel. It's almost like having a large window
but one you can place and aim wherever you want. Here is one
aimed horizontally... And in this case, it is aimed straight down over my eBay shooting table...
Accent Photo Lighting for EffectIn addition to key (main) lights and fill lights, photographers often add accent lights for special effects. For instance, in portrait photography, a photographer will sometimes use a "hair light" to add highlights on the subject's hair. This can also help separate the subject from a dark background. This small light is placed high, on the back side of the subject (often somewhat to the side, to keep it out of the picture). However, you don't have to buy or use lots of lights when you're dealing with small items for eBay. For instance, a simple magnifying makeup or shaving mirror can reflect your main light in a small controlled spot back at the subject. I use one whenever I want to add some sparkle to an item. Here is one being used to brighten up that little rabbit, along with a single softbox...
Check out
Jewelry where I take up the subject of how to shoot jewelry
and other shiny items using a light tent.
|
|||