How to Photograph Fabric and Clothes
Breaking Out the Gear
If you have a fully stocked studio, you could use everything in it to make great pictures of fabric, but you only need a few simple things to get started. I use the Nikon D700, a full frame DSLR, for my shoots. Paired with either a 50mm or a 24mm, I have all the range I need to photograph a close-up or a full length shot of a dress.
In terms of lighting, I sometime only use one hotshoe flash with manual capabilities, but this only works if you're shooting in the right environment. My home studio has three white walls and a white ceiling. If you have a room like this in your house, it will save you a lot of trouble. When properly lit, a white room becomes a giant light tent that you can stand up in.

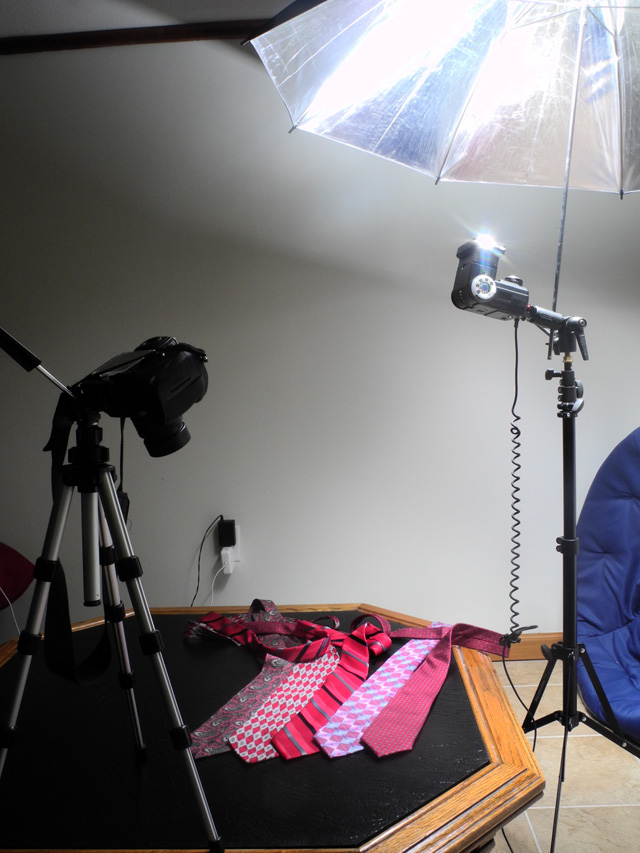
For location shoots where I don't have a good room, I'll use two flashes on stands with umbrellas. Umbrellas seem to be out of fashion with photographers at the moment. While softboxes do offer more control over the light, I find that if you're looking to get your light as soft as possible and you don't have a corporate budget, umbrellas can't be beat.
You can get a 60 inch umbrella for less than $50 USD, while a similar amount of money might only get your 36 inches in a softbox. When you step the size up even more, the price difference is worse. A seven-foot diameter Octodome will cost more than $400 USD, while a seven-foot umbrella will only set you back $100 USD.
Lighting for Texture
The most important thing to think about when photographing any fabric is texture. No matter what type of fabric you're shooting, you're either trying to overcome the texture or showcase it. A necktie is made up of thousands of woven fibers, but it needs to look smooth and shiny. A sweater might have an intricate knitted pattern that needs to be shown off.
Whether you're hiding texture or showing it off, you're using the same technique: perfect control of soft, direction light. If you take away nothing else from this tutorial, I hope you get an understanding of how to light and texture are forever bound to each other.

Side Light
I usually only use one light for fabric photos for a couple of reasons. First, I'm usually in my white room, so the reflections off the walls fill in drastic shadows. Second, and more important, the light needs to be directional to bring out textures.

Side Lighting
Textures are revealed by the mix of shadows and highlights that creating depth to the image. Look at the texture of something simple like your hand. With no shadows accenting the wrinkles, it looks smooth. If you want to emphasize this contrast in fabrics, you need to use strongly directional side lighting. If you imagine the fabric is a great big flat piece of land, you want the sun to be setting.
Keep in mind that side lighting is relative. The illustration shows what side lighting is for a piece laying flat on a table. If your piece is hanging, or sitting upright, then you're light will need to move to accommodate the change.
Direct Light
Think of direct light as the opposite of side light. Instead of shooting at sunset, you're shooting at noon. The light, while still soft, is coming directly at your fabric. This reduces texture and hides flaws.

Direct Lighting
You'd be surprised at how often you don't want to emphasize the texture of fabric. Again, the light position is relative to the position of the surface. For objects arranged flat on a table, the light would come from overhead. For objects arranged vertically, the light would come straight at them from the same direction as the camera.
Now let's jump in and work through some different common examples of fabrics that you might need to work with.
Gnarly Knits
In a previous photo, I showed you a knitted object shot with both side and overhead lighting. Most knitted objects are all about the texture. You'll want to showcase it in some way. Side lighting is an easy place to start. I was recently tasked with photographing a knit hat.
Large horizontal waves were the most prominent feature in the texture. Using side light in opposition to these meant positioning light directly above the hat. Had I shot the hat with my lights to left or right, the waves wouldn't have been as apparent.

Depth of Field
I'd like to quickly mention depth of field. When shooting products like this for friend's website or your own amusement, use whatever depth-of-field you want. However, if you're doing a commissioned job for a magazine or a business, they will want sharp edges.
In the hat photo above, I was essentially working in a macro situation. Shooting that close to your subject means that your depth-of-field will shallower. So I needed to make sure I stopped down a lot to get the edges of the hat in focus while still focusing on the front of it.
The reason for the industry obsession with sharp edges is due to their heavy use of cut outs. By cutting out the image, they are able to layer text and other images with it. Blurry edges are all but impossible to cut out well.
Slick Silks
The next photo we will take a look at features five silk ties. In my mind, silk is practically the exact opposite of knits. Instead of large visible fibers, you have a slick, highly reflective surface.
When working with any reflective surface, you can fight the reflection or embrace it. For my shot, set my camera up to capture it.
Remember the mantra, "the angle of incident equals the angle of reflection." The means that I need to match the angle the light is hitting my subject and with my camera angle. Imagine that your flash is shooting a tennis ball instead of light. You want to put your camera in a position to catch the ball after it bounces off your subject.
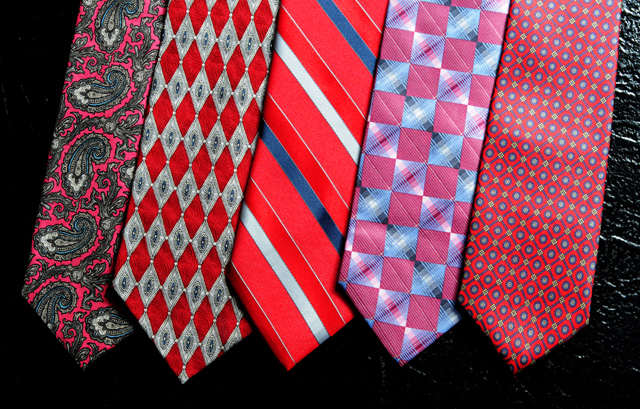
When you look at the photo, you really get a sense of shiny nature of the ties. What might not be so obvious is what's happening to the texture. By having both my camera and my flash almost directly above the subject, I'm using direct lighting. I'm hiding imperfections and making everything look flatter. Take a look.

You'll really see how direct light and side light affect fabrics in the next photo.
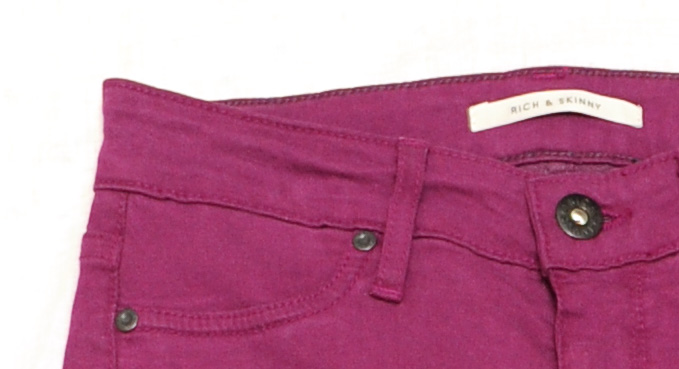
White Balance
I want to make a quick note about white balance. When photographing someone's product, it's essential that the colors match perfectly. No one wants to see yellow dresses in an advertisement and show up at the store only to find orange ones.
To insure that your white balance is perfect, slip something that's pure white into the frame of your image. This way you'll have a clickable reference once you jump into Photoshop or Lightroom.

What color was the shaw?
Another thing to consider is figuring out the exact Kelvin measurement of your flashes with different modifiers. I know that with my silver reflective umbrellas, my flash produce a light that is 5600K. So that's one less thing to figure out once I arrive at a shoot. Your flash may vary by 100 or 200K.
Dirty Denim
Let's take a look at some jeans. When shooting certain types of clothes, it might be hard to know whether to hide or showcase the texture. In some case, it might be better to shoot it both ways.
The following shots jeans were made during an insane day of shooting for a catalog. I barely had time to breathe let alone adjust a big lighting kit between every photo. So I worked with a hotshoe flash on my camera. What can I say? Being professional often means being quick. I also knew a professional retoucher would be handling all the post-production.
These two photos perfectly demonstrate how lighting angle affects texture. These jeans were hung on a wall directly in front on me. For the shot on the left, I bounced the flash off the ceiling creating side light, similar to photo of the knit hat (the side is just up instead of left or right). For the shot on the right, I bounced my flash off the wall behind me creating direct light.
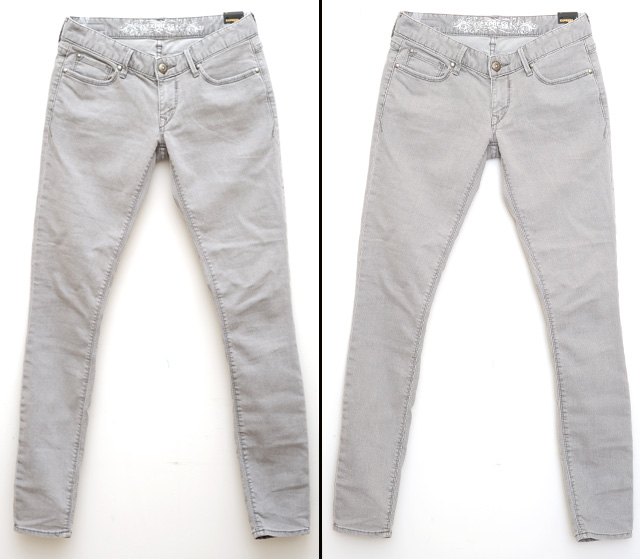
Side light on the left, direct light on the right.
Which side do you like better? I think I like the more creased look for this particular style of jean. There is certainly a place for the more flattening, texture hiding light.
Shooting Your Own Fabrics
If you seek them out there are plenty of opportunities out there for this type of photography. From vintage and handmade clothes for sale on Etsy and eBay to high end catalog shoots, it all needs to be photographed.
It all comes down to texture and accuracy. Once you master the techniques of side lighting and direct lighting to capture the texture of the fabric, you're well on your way to developing a killer portfolio. After delivering photos that exactly showcase the color of a piece of clothing, you may have captured a great client.